|
I have a whole recipe dedicated to starter feeding and maintenance written shortly after I started "The Net's 1,000,000th Baking Blog". I stand by it. It's not wrong.
But it also doesn't reflect my reality. In the recipe, I talk about saving your feeder discard to create all sorts of things - most especially crackers. I love those crackers...they are one of the best things ever to come from a sourdough jar. But now when I make them, I have to intentionally create discard. Why? Because even though I make bread every four or five days, my process involves zero wasted sourdough starter. That's right - No Discard. I feed the starter from the fridge the night before I bake. In the morning it's ready. I use all but about a quarter cup, and stick that directly in the fridge without feeding it again. It always works. No matter how long I go between baking, the bread still comes out beautifully with a single feeding. It might take longer if I've left it unused and untended for a month, but with a little patience the final product is as good as if you'd been caring for it like a newborn.
0 Comments
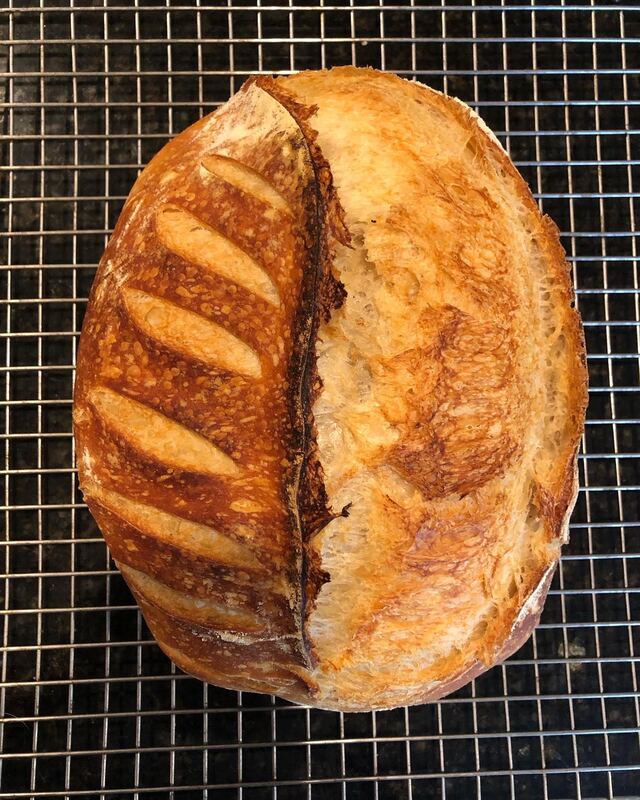
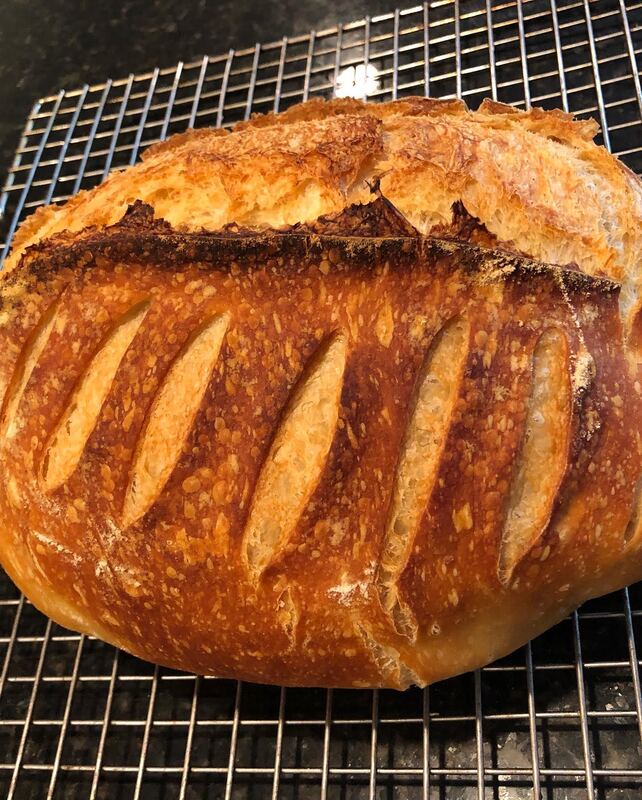
I resisted for a long time, but there is a low-impact path to better texture and crust for your Sourdough Loaf in three steps. 1 - Stop worrying about an exact amount of water in the initial mix. An additional 10, 20, or 30 grams of water makes for a better loaf in almost every case. I seem to have settled on about 20 more grams most of the time. I make the call based on the weather and previous experience with the particular batch of flour. 2 - I didn't want to do it, but my crust wasn't getting better no matter how much steam I added to my open oven/cookie tray method. I've converted to a cast iron pot. A BIG one. And it has made all the difference. Preheat your cast iron pot with the lid as the oven comes up to temp. When the oven is pre-heated, turn your loaf on to a larger than necessary sheet of parchment. Remove the pot from the oven, remove the lid, make your cuts to the loaf, and transfer to the HOT cast iron. 3 - Dash a little water into the cast iron pan before you close it up and return to the oven. Just a couple tablespoons between the parchment and the side of the pot will give you a much thicker and chewy crust. Happy sourdough-ing and YES, it's still all AP.
Using lemon curd (AP Bakery Recipe here) on desserts from pavlova to cake is a no-brainer. It's even the preferred filling for The AP Bakery's Almond Victoria, which I recently made for the second year running for that special someone.
As I made my way through the half jar of leftover curd - which lasts for weeks in the fridge with proper storage, btw - it occurred to me there is, or rather should be, a single perfect use for lemon curd. Toast. Think about it. What is lemon curd? Fruit - putting preserved fruit on toast from marmalade to grape jelly is an honored tradition. Eggs - have you ever seen a breakfast menu item that doesn't offer at least one egg cooked to order? Butter - what monster would serve toast (or eggs) without offering a pat of golden dairy? And that's it fruit, eggs, and butter all in one delicious, velvety spoonful spread across a slice of homemade bread crisped up into perfect golden brown toast. I rest my case.  Hey All - I've been testing out some lemon cake recipes, and wanted to put something up about a baking pet peeve. [Maybe this should be an entire series of things home bakers should do/know, but nobody ever seems to focus on. Thoughts?]
Today's peeve: the Zesting Method The somewhat longer version of this story comes from somewhere far afield from baking. I'm a huge fan of the YouTube series How To Drink. If you are, like myself, a fan of the occasional cocktail, I can't recommend Greg's creative take on drinking highly enough. The vids he produces are famous (infamous) for close-up, slow-mo, nigh-on-pornographic shots of the addition of each new ingredient. While watching the pulling of zest for garnish, the question occurred to me, if that much essence is sprayed from a wide peel, how much more from zesting? Shouldn't all those essential oils be in the dough or batter and NOT in the prep bowl or all over your kitchen? I don't think anyone wants their kitchen to smell orangey-fresh if the resulting bake is going to be one iota inferior. My preferred Zesting Method: only at the last possible moment and directly into the mixing bowl. Especially in a recipe where only a single lemon, lime, orange, etc is being used, it only makes sense for every last bit to wind up in the recipe. It could be the difference between an OK loaf and one with mouth-watering zing. Certain popular baking professionals have been advocating for the looooong creaming method. If you haven't heard about it, that's where you continue to cream the butter and sugar for ten minutes or more before proceeding to the next stage of the recipe. The argument is that you need that long to punch all the holes in the butter for maximum rise and optimum crumb.
I've experimented some with this, and have to say there is some method to that particular madness. Although, I can't say if the time is worth the increase in quality, or where the two might balance out. (I'd love to hear your opinion.) The paste or reverse creaming method, I have not played with much at all. But, scientifically speaking, it makes a lot of sense. If you haven't done it before. it's where you add the flour, sugar, and leavening to the mixer, skip the liquid for the time being, and allow the butter to completely integrate, Just like you are rubbing in butter for biscuits or pastry. Only when you get to a fine sandy consistency from the dry and butter mixture, do you add the combined liquids. To me this makes a ton of sense for cakes. Why? Because once the flour is entirely coated with fat (the butter), it will take gluten a long time to form after the addition of the liquid. So there's way less worry about over-mixing. In fact, the danger becomes the opposite. And I would rather have to mix until smooth than worry about creating too much gluten with one more stir. Just a few minutes ago, I posted the Cinnamon Swirl Bread recipe.
It's a bit of an odd one with extra bench proofing, stretching, rolling out, etc, but I like it because of the consistency of the crumb. Someday I may try chilling the dough between steps and see if I get some unexpected form of lamination. LMK if you've done anything like that and what the results were. I felt certain I'd already posted it. In fact, it should have been recipe four or five instead of number eight. I think in all the testing for the doughnuts/donuts, it got lost somewhere. Anyway, the loaves have already been devoured, and now that I've written it out and posted it, I wish I had more. I've been working on a Sourdough Bialy recipe, trying out several reputable recipes and replacing the store bought yeast with my living colony. One of my favorite resources for technical recipes (along with explanations), had a Bialy recipe, so I decided to give it a shot.
SPOILER - it failed miserably. But why did it fail so completely? Well, gentle readers, it was because of something we've all been warned about over and over again, but I never took seriously. "Keep salt away from yeast, you might affect your rise." I've ignored this advice and never had a problem. Bialys, for a yeasted dough, contain a lot of salt. If you've never had one, they're kind of a cross between a pretzel and a bagel. And, this particular recipe, I believe had a misprint, asking for 2 tbsp salt instead of 2tsp. Combine this with the fact that sourdough starter doesn't have nearly the pop of store bought yeast, and the resulting dough just sat there no matter how long I waited or how I encouraged it. After 24 hours (yep, I let it go just to see what would happen), I got a few measly bubbles from a very active starter. I even cooked them, and they were little better than a salt lick. My take-away from this is that you actually can damage your yeast with salt, BUT it seems to take a 3-5% salt by weight to do any real damage. So, I will continue to ignore the yeast/salt warning.. Except in heavily or moderately salted doughs when I'm using my starter. 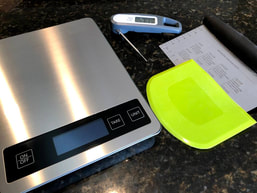 Taking for granted anyone reading this has a mixer, bowls, their favorite wooden spoon, and an endless supply of parchment paper, there are a few items even the most languid of bakers shouldn't do without:
1 - Food Scale: I will always tell you if exact measurements don't matter in a recipe, but, let's be honest, baking is a precision sport. Must have features: measures in metric and imperial, has a TARE button, easy to clean, can handle five pounds without throwing an error. (My old scale [not pictured] would error out if my bowl was too heavy when weighing out flour for two loaves of bread. Guessing about that much flour is NOT fun.) 2 - Bench and Bowl Scrapers: If I could pick just one, I'd take the dollar store bowl scraper, but I use one or both almost every time I bake. They handle soft dough, prevent deflation, keep things tidy, cut, and a dozen other things. The stainless bench scraper pictured has a couple cool features: clearly marked rulers on both sides and a helpful conversion chart. 3 - Instant Read Thermometer: I don't love most cakes. Why? Because they're universally over-baked in order to get to the golden brown color people expect. I pull mine at 195F/90.5C. That means they sometimes don't look done, but they certainly taste better that way. I also wouldn't attempt to make my own jam, marmalade, custard, or curd without one. Hey Lazy Bakers!
So, just posted the Danish Twist recipe, and wanted to talk about using your own sourdough starter instead of the yeast in the recipe. It's actually what I do most of the time. The general rule of thumb (etymology of that phrase is associated with milling/baking, so always appropriate in a baking blog) is you need 100g of active, alive, awesome starter. Two things to remember if you go this route: 1 Because your starter is generally 50% water, you need to reduce the milk in the recipe accordingly. In the Twist, it calls for 180g milk, so reduce to 130g milk if you are using starter instead of instanty yeast. Same goes for the flour - reduce accordingly. 2 Rising will take MUCH longer. The first proof has taken as long as four or five hours in cool weather. The second can take up to three hours. Is it worth it? YES. |
About RobAuthor, Dad, Dog Walker, and Occasional Baker Archives
April 2023
Categories |
 RSS Feed
